Step by step tutorial on a baby card with giraffe and a video tutorial
Hello everyone!
I’m so exited of the new look of our blog! It is much prettier don’t you think? We’ve worked a lot to have it like this and we are both really happy with the result! I want to say a big thank you to the other “S” of the SnS team for all the work and effort for the blog!
The background
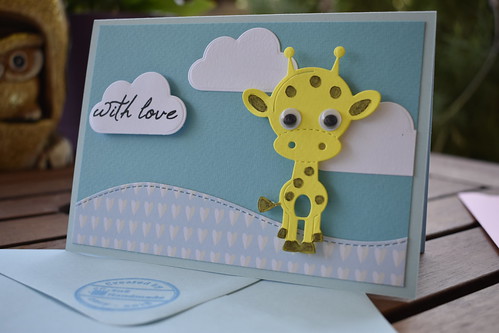
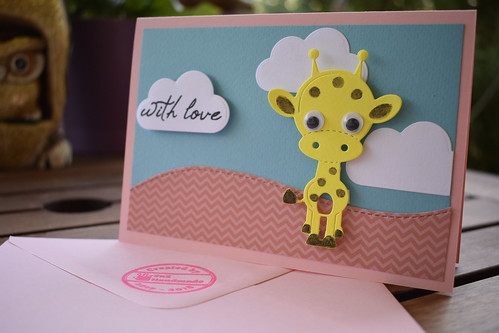
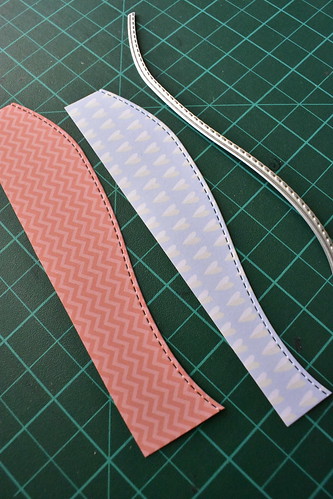
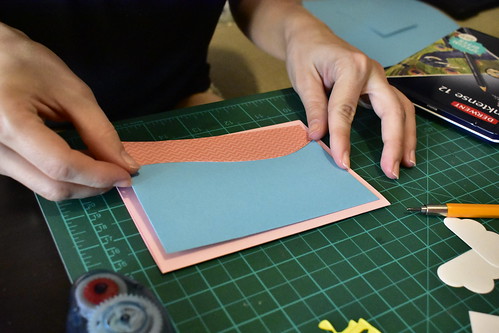
Today I have another baby card for you today! We aloe prepared a little video of the making and we would both love to hear what you think about it! It is an easy card to make if you have the right dies on hand. It is just a matter of combining the colors and setting the scene of the card. I wanted one for a baby boy and one for a baby girl so I started with two card bases, in pink and in blue. I always have my card bases printed with our logo and pre-scored. This way it saves a lot of time and I can jump right into creating the card. Firstly I cover the card front with a light blue paper that would represent the sky of the scene that I’m planning to create. Then I choose my pattern papers. This would be the ground of my scene. I die cut them with a stitched wavy die that I got from AliExpress and I glue them down to that lower part of my card front. Then I use my Sizzix again to create three clouds. The two will go in the background and I will use the third to stamp my sentiment. Since I have my Sizzix out I also die cut the giraffe that will be my focal point.


The focal point
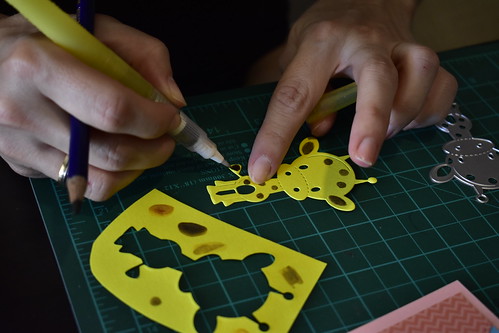
My card’s focal point is this cute giraffe that I also got from ALiExpress. Though it is very cute and pretty I miss the little brown spots on the its body so I will make them myself with my Inktense Pencils. And I will put a pair of googly eyes to make even more adorable!
The sentiment
As I mentioned before I will stamp my sentiment on the third cloud si it will blend perfectly with my background. So now that I have all my elements ready it’s time to put everything in place. Before I stick down anything I try different ways to arrange my card scene. When I’m finally sure I commit by gluing them down with my tape adhesive.

And my card is ready! So what do you think! Simple and easy! I hope you enjoyed this card! make sure to check out the video! I will see you all in a few days with a new card! Until then…happy crafting!